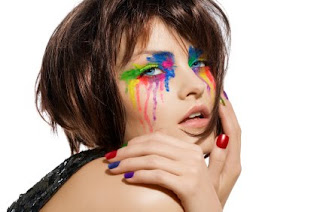
I started with this image [Not mine, Found on the Internet]

The first step is to make a copy of that background layer and desaturated it, I used hue/saturation and took all saturation out, and labeled that layer BW to keep things in order. Also lighting up the photo a bit in curves to bring out some details may help for a better look.
Next I made another copy of the original background and put it on top of all layers and put it on the soft light mode and labeling it soft light helps for neatness and confusion.
It gives a cool look and you can take down the opacity if wanted for desired look.
You can just stop there or you can take it a step further by keeping those colors bright and funky. You can do a mask to bring out those color or you can boost it up by creating a color balance layer, put them at the extreme max of wanted colors, click ok and put it on the soft light mode as well. (this is now the top layer)
Now you make one more copy of the original photo and put it on the Overlay mode, the look similar but the next step where it comes together.
Lastly make a layer mask on your last overlay layer, invert it (on this particular picture you do, some you don't have to invert depending the look you want) in the mask paint white the colors you want to pop more, you may also turn down to the desired opacity. . . . this is the result.
Once you get it down its pretty simple to give a fashion style muted look with a lil pop!
You can find the tutorial on lynda.com for a more in depth step by step.


No comments:
Post a Comment